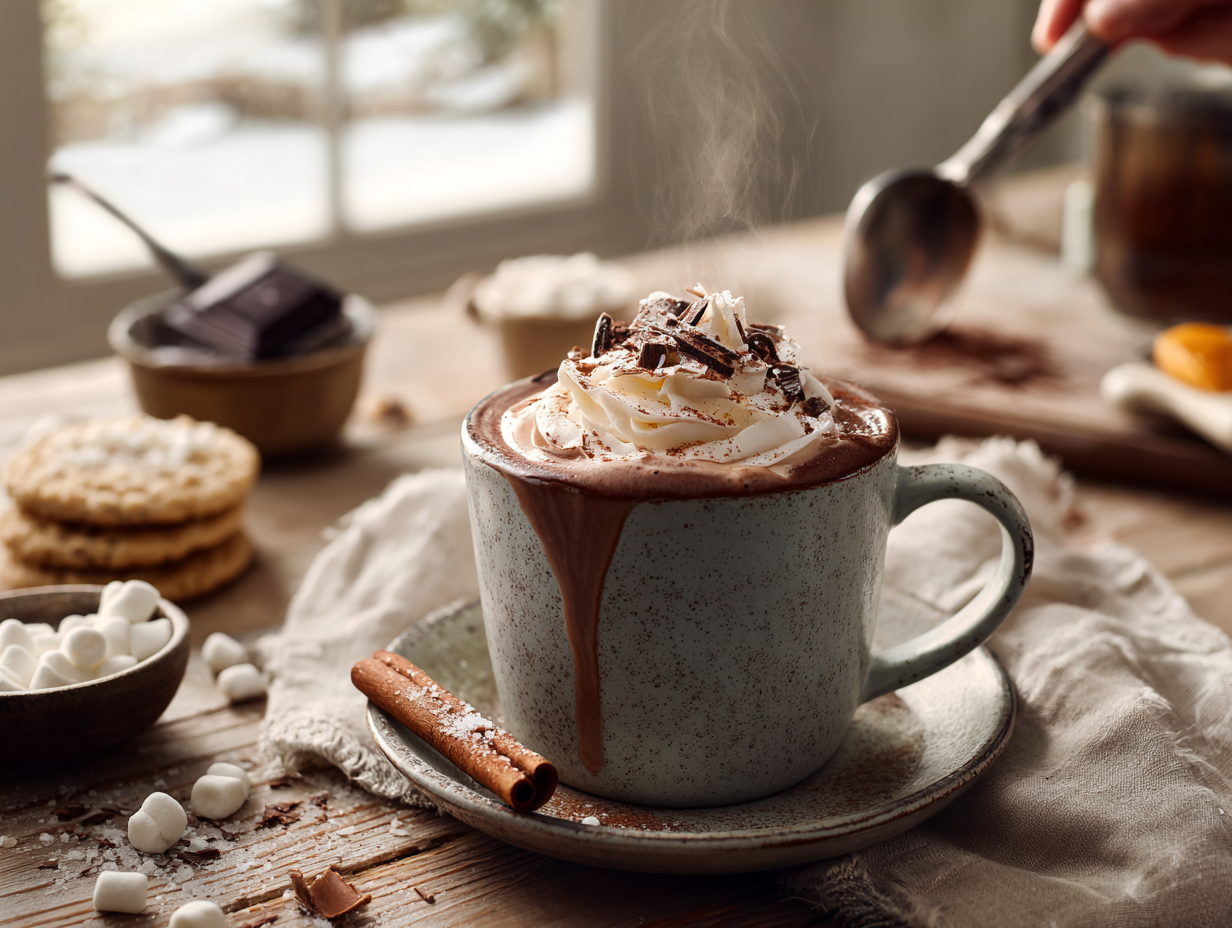
Silky Hot Cocoa with Salted Cocoa Whipped Cream

Dutch-process cocoa is bloomed in hot liquid, then a small amount of real chocolate is melted in for extra body, producing a smooth, rich cup in well under 30 minutes. A salted cocoa whipped cream on top adds a subtle savory contrast, and optional cinnamon or citrus zest can be stirred in for added warmth.
Equipment
- 2- to 3-quart heavy-bottomed saucepan
- Whisk
- Heatproof spatula
- Measuring cups and spoons
- Fine mesh sieve (optional, for extra smoothness)
- Instant-read thermometer (optional)
- Mixing bowl (chilled) for whipped cream
- Hand mixer or balloon whisk
- Ladle
- 4 heatproof mugs
Ingredients
For the Hot Cocoa Base:
- ⅓ cup granulated sugar adjust to taste
- 3 tbsp Dutch-process cocoa powder look for high-quality like Valrhona or Guittard; natural cocoa works but tastes brighter
- ½ tsp instant espresso powder optional; amplifies chocolate flavor without tasting like coffee
- ⅛ tsp kosher salt balances sweetness
- 3 cup whole milk for best texture, do not use nonfat
- 1 cup half-and-half for extra richness; sub with 1 cup whole milk for lighter cocoa
- 3 oz semi-sweet chocolate, finely chopped (60–70%) Ghirardelli, Guittard, or similar; chop finely for quick melting
- 1 tsp pure vanilla extract add off heat for best aroma
- 1 stick cinnamon optional; 3-inch stick for gentle spice
- 1 strip orange peel (2-inch) optional; use a peeler for minimal pith
For the Salted Cocoa Whipped Cream (Optional):
- ½ cup heavy whipping cream, cold chill bowl and beaters for faster whipping
- 1 tbsp powdered sugar also called confectioners’ sugar
- 1 tsp unsweetened cocoa powder Dutch-process preferred for smoothness
- 1 pinch flaky sea salt enhances cocoa flavor
For Garnish (Optional):
- ½ cup mini marshmallows optional
- 1 oz dark chocolate bar, for shaving use a peeler for curls
- ¼ tsp ground cinnamon optional, for dusting
Instructions
- Stage Your Tools (1 minute): Chill a mixing bowl for whipped cream. Set a saucepan over the stove and place a whisk and spatula nearby.
- Bloom the Cocoa (1–2 minutes): In the saucepan off heat, whisk together 1/3 cup sugar, 3 tbsp cocoa powder, 1/2 tsp espresso powder (optional), and 1/8 tsp kosher salt. Whisk in about 1/3 cup of the milk to form a smooth, glossy paste with no dry pockets. Turn heat to medium and warm just until the paste steams and deepens in aroma—this “blooming” unlocks chocolatey depth.
- Warm the Dairy (5–7 minutes): Gradually whisk in the remaining 2 2/3 cups milk and 1 cup half-and-half. Add the cinnamon stick and orange peel if using. Heat over medium, whisking occasionally, until the mixture is steaming hot but not boiling—about 170–180°F / 77–82°C. You’ll see wisps of steam and tiny bubbles around the edges; avoid a rolling boil to keep it silky.
- Melt the Chocolate (1–2 minutes): Remove from heat. Add the 3 oz finely chopped chocolate and 1 tsp vanilla. Let sit 30 seconds, then whisk gently until completely smooth and glossy. If a few flecks remain, return to low heat and whisk another minute.
- Froth for Body (15–30 seconds): Whisk vigorously or use an immersion blender for 15–30 seconds to aerate slightly—this creates a luxurious, café-style texture.
- Make the Whipped Cream (2–3 minutes, can be done in parallel): In the chilled bowl, whisk or beat 1/2 cup heavy cream, 1 tbsp powdered sugar, 1 tsp cocoa powder, and a pinch of flaky salt until soft peaks form. Soft peaks will curl over gently when the whisk is lifted.
- Strain (optional, 30 seconds): For ultra-smooth cocoa, pass through a fine-mesh sieve back into the warm saucepan or a pitcher.
- Serve (1 minute): Ladle into warm mugs. Top with a dollop of salted cocoa whipped cream or a handful of mini marshmallows. Finish with chocolate shavings and a whisper of cinnamon, if you like.Cook Time Reference: Bloom 1–2 minutes; Warm dairy 5–7 minutes; Melt/froth 2–3 minutes. Total active heating is about 10 minutes.
Notes
Jen’s Tips:
- Dutch vs. Natural Cocoa: Dutch-process gives a smoother, rounder chocolate flavor; natural cocoa tastes fruitier. Both work—adjust sugar to taste.
- Thickness Control: For a richer, sippable texture, sub the half-and-half with heavy cream. For even thicker “drinking chocolate,” whisk in a slurry of 1 tsp cornstarch + 1 tbsp cold milk and simmer 30 seconds (about 185°F / 85°C), whisking.
- Dairy-Free/Vegan: Use 3 cups unsweetened almond milk + 1 cup canned light coconut milk. Swap the chocolate for a dairy-free bar and top with coconut whipped cream.
- Sweetener Swaps: Replace sugar with 1/4 cup pure maple syrup or 3 tbsp light brown sugar for caramel notes.
- Flavor Twists: Peppermint (add 1/4–1/2 tsp peppermint extract off heat), Mexican-inspired (add 1/8 tsp cayenne + 1/2 tsp ground cinnamon), Mocha (add a hot espresso shot to each mug).
- Pre-Warm Mugs: Fill with hot water for 1–2 minutes, then dump and dry. This keeps cocoa hotter, longer.
Serving Suggestions:
- Presentation: Aim for a glossy, mahogany sheen with a pillowy cap of whipped cream. Finish with delicate chocolate curls (use a vegetable peeler) and a light cinnamon dust.
- Pairings: Serve with butter cookies, biscotti, or churros. A side of fresh orange slices brightens the palate.
- Beverage Pairings: Espresso for a DIY mocha; for adults, a splash of coffee liqueur or peppermint schnapps.
Culinary Context:
Hot cocoa traces its roots to Mesoamerican cacao drinks—spiced, unsweetened, and symbolic—later sweetened and softened with milk in Europe and the U.S. This version nods to that journey: spice and citrus optional, modern technique for texture, and a touch of real chocolate for old-world richness.Optional Advanced Instructions:
- Make-Ahead Mix: Combine 1 cup sugar, 1 cup Dutch cocoa, 2 tsp espresso powder, and 1 tsp fine salt in a jar. For each 1 cup milk, use 1 heaping tbsp of the mix and adjust to taste.
- Parallel Prep: Start whipping the cream while the dairy warms. Strain cocoa into a warmed pitcher for clean service.
- No Whisk? Use a blender: blend hot cocoa carefully on low, venting the lid to release steam.
Timing:
- Prep Time: 10 minutes (measure, chop chocolate, chill bowl, optional garnishes)
- Cook Time: 10 minutes (bloom 1–2 min; warm 5–7 min to 170–180°F / 77–82°C; melt/froth 2–3 min)
Course:
- Dessert
Origin:
- American
Nutrition
Calories: 563kcalCarbohydrates: 54gProtein: 12gFat: 35gSaturated Fat: 21gPolyunsaturated Fat: 1gMonounsaturated Fat: 10gTrans Fat: 0.02gCholesterol: 78mgSodium: 207mgPotassium: 627mgFiber: 5gSugar: 44gVitamin A: 966IUVitamin C: 1mgCalcium: 344mgIron: 3mg
Tried this recipe?Rate this recipe !
