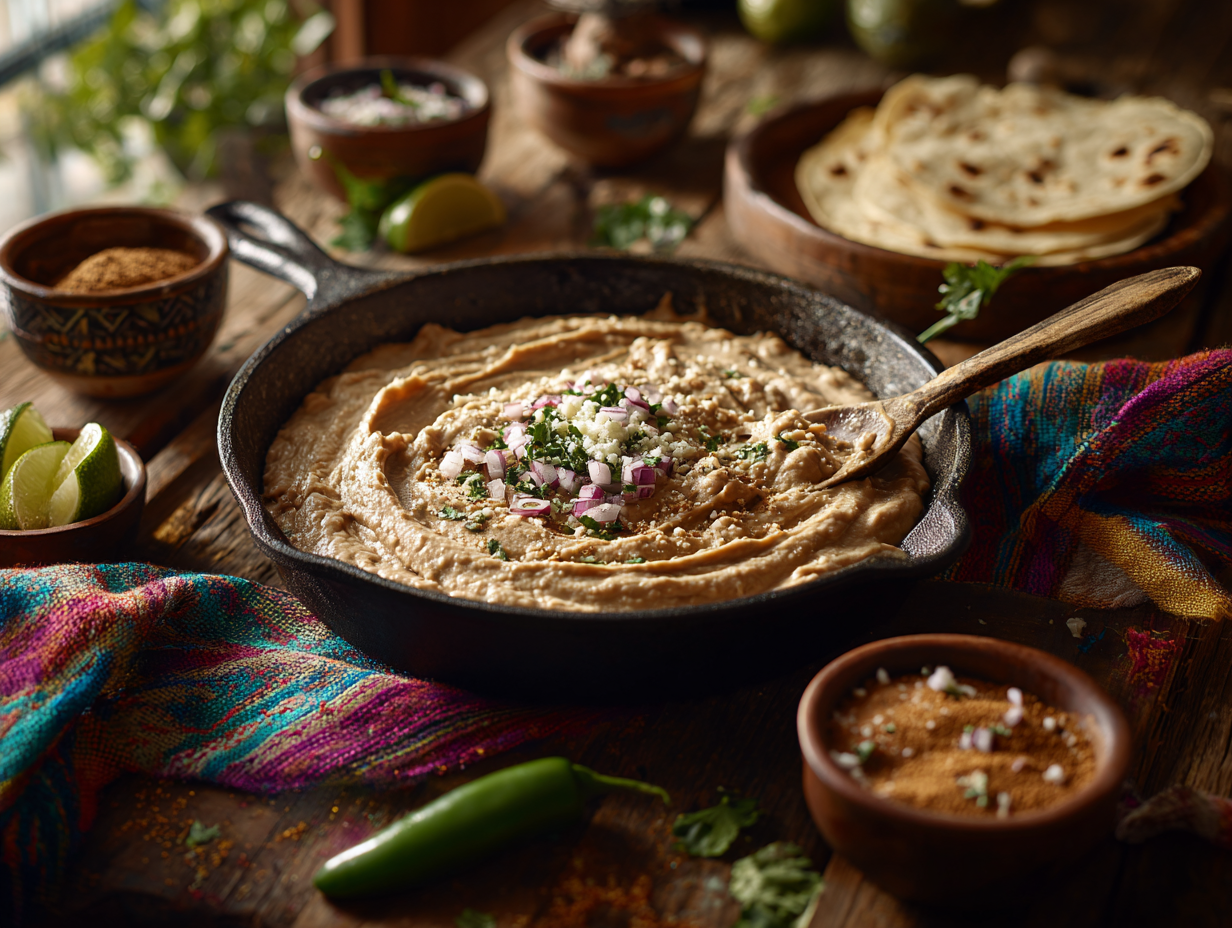
Weeknight Refried Beans (Frijoles Refritos) — 30-Minute Method

Blooming spices in hot fat, then mashing and frying pinto beans in the same pan, builds the caramelized, nutty flavor that makes refried beans worth making from scratch. The method works with lard for a traditional result or avocado oil for a vegetarian version, and the whole batch is ready in about 30 minutes. Serve alongside tacos, eggs, rice bowls, or anything that benefits from a creamy, savory side.
Equipment
- 12-inch heavy skillet or sauté pan (cast-iron or stainless steel)
- Potato masher (or immersion blender for smoother beans)
- Wooden spoon or heat-proof spatula
- Measuring cups and spoons
- Small saucepan or microwave-safe cup (to warm broth)
- Medium bowl (to reserve bean liquid)
Ingredients
- 2 tablespoons lard or avocado oil for vegetarian
- 1 small yellow onion finely diced (about 1 cup)
- 1 piece jalapeño seeded and minced (keep seeds for extra heat)
- 2 cloves garlic minced (about 2 teaspoons)
- 1 teaspoon ground cumin
- ½ teaspoon Mexican oregano lightly crushed between fingers
- ¼ teaspoon smoked paprika optional, for subtle smokiness
- 2 cans pinto beans (15 oz each), drain but reserve 1 cup can liquid; brands like S&W, Goya, or Rancho Gordo hold shape well
- ½ cup low-sodium chicken or vegetable broth warmed
- 1 teaspoon kosher salt plus more to taste
- ½ teaspoon freshly ground black pepper
- 2 tablespoons unsalted butter optional, for extra silkiness
- 1 tablespoon fresh lime juice
- ¼ cup cotija cheese crumbled, for serving
- 2 tablespoons fresh cilantro chopped, for serving
- 1 tablespoon red onion finely diced, for garnish (optional)
- ¼ teaspoon ancho chili powder for dusting (optional)
Instructions
- Prep and Warm Liquids (2–3 minutes): Open the pinto beans, drain over a bowl, and reserve 1 cup of the can liquid. Warm the broth until steamy (microwave 45–60 seconds, or in a small pot over low). Warming helps the beans emulsify smoothly.
- Heat Fat and Sauté Aromatics (5–6 minutes): Set a 12-inch skillet over medium heat; preheat 2 minutes until the surface approaches about 350–375°F (175–190°C). Add lard (or oil). When it shimmers, add the diced onion with a pinch of salt; sauté until translucent and lightly golden at the edges, 4–5 minutes. Stir in jalapeño for 1 minute, then garlic for 30 seconds until fragrant.
- Bloom the Spices (30 seconds): Sprinkle in cumin, Mexican oregano, and smoked paprika (if using). Stir constantly for about 30 seconds to bloom—aromas should become toasty and vivid without scorching.
- Add Beans and Mash (5–7 minutes): Add the drained beans, 1 cup reserved bean liquid, and 1/2 cup warmed broth. Bring to a gentle simmer (around 185–195°F / 85–90°C). Reduce heat to medium-low. Mash with a potato masher to your preferred texture—chunky for rustic, smoother for spreadable. For ultra-smooth, use an immersion blender in short bursts (a food processor works, but the puree may be slightly pasty; add extra fat/liquid to balance).
- Refry to Deepen Flavor (3–5 minutes): Raise heat back to medium. Using your spatula, press the mashed beans against the hot pan to encourage light browning; let them sizzle for 20–30 seconds, then stir and repeat. This “refrying” adds nutty, savory notes. If beans thicken too much, splash in a few tablespoons of warm broth or water.
- Season and Finish (1–2 minutes): Stir in kosher salt, black pepper, butter (if using) for silkiness, and lime juice to brighten. Taste and adjust salt/acidity. Beans should be creamy and spreadable, holding soft peaks.
- Hold for Service: Keep warm over low heat. If holding more than 5 minutes, add a spoonful of liquid and stir occasionally to maintain gloss.
Notes
Jen’s Tips:
- Heat Management: If the pan smokes, reduce heat; if beans don’t sizzle when pressed, increase slightly. Aim for lively but controlled bubbling.
- Consistency Fixes: Too thick? Add warm broth or bean liquid 1–2 tablespoons at a time. Too loose? Simmer a minute, stirring, to evaporate.
- Storage: Refrigerate up to 4 days; rewarm with a splash of water or broth. Freeze up to 2 months.
- Allergy/Diet Swaps: Dairy-free by omitting butter; low-sodium by rinsing beans thoroughly and seasoning at the end.
- Fat Matters: Lard delivers classic depth; avocado oil is clean and vegetarian; add 1 tablespoon bacon fat for smokiness.
- Texture Control: Chunkier beans love tortillas and bowls; smoother beans spread beautifully in burritos. Add liquid in small splashes to fine-tune consistency.
- Bean Choice: Pinto is classic; black beans are excellent—swap directly. For ultra-creamy, simmer canned beans 5 extra minutes in broth before mashing.
- Vegan: Use oil, omit butter; finish with a drizzle of olive oil or a spoon of tahini for body.
- Spice Variations: Add 1/4 teaspoon chipotle powder for gentle heat or 1 teaspoon adobo sauce from chipotles for smoky depth.
- Sodium Savvy: Season at the end—canned beans vary in saltiness.
Serving Suggestions:
- Plating: Spoon beans into a warm shallow bowl and swirl with the back of a ladle to create ridges that catch toppings.
- Garnish: Crumbled cotija, cilantro, a dusting of ancho chili powder, and a few red onion pearls. A drizzle of Mexican crema or good olive oil adds sheen.
- Pairings: Perfect beside carne asada, enchiladas, or roasted veggies; spread into tacos and burritos; top with a fried egg for breakfast.
- Cook’s Visual Cues: Look for a glossy surface, soft peaks, and gentle steam—aroma should be nutty and savory with a bright citrus lift.
Culinary Context:
In Mexico, refried beans are everyday comfort. The name derives from the Spanish refritos, meaning “well-fried,” not twice-fried. Lard and oregano are traditional in many regions, while northern cooks often favor pinto beans for their creamy texture. My twist centers on blooming spices for speed and pressing the mash against the pan to mimic the slow-cooked caramelization you’d get from a comal—weeknight timing, weekend flavor.Optional Advanced Instructions:
- Make-Ahead: Cook dried pinto beans (2 cups dried) until tender, salt to taste, and refrigerate up to 4 days. Use 3 cups cooked beans plus 1 to 1 1/2 cups cooking liquid in place of canned.
- Restaurant-Smooth Finish: After mashing, whisk in 1 tablespoon butter or 1 tablespoon neutral oil in a slow stream for a glossy emulsion.
- No Masher? Use a sturdy fork (chunky texture) or an immersion blender (silky). A food processor works; add an extra tablespoon of fat to prevent gumminess and pulse, don’t run continuously.
Timing:
- Prep Time: 0 hours 10 minutes
- Cook Time: 0 hours 18 minutes
- Total Time: 0 hours 28 minutes
Course & Origin:
Course: Dinner (side or filling) Origin/Cuisine: MexicanNutrition
Calories: 66kcalCarbohydrates: 3gProtein: 2gFat: 5gSaturated Fat: 3gPolyunsaturated Fat: 0.2gMonounsaturated Fat: 1gTrans Fat: 0.2gCholesterol: 16mgSodium: 469mgPotassium: 81mgFiber: 1gSugar: 1gVitamin A: 500IUVitamin C: 7mgCalcium: 57mgIron: 1mg
Tried this recipe?Rate this recipe !
