
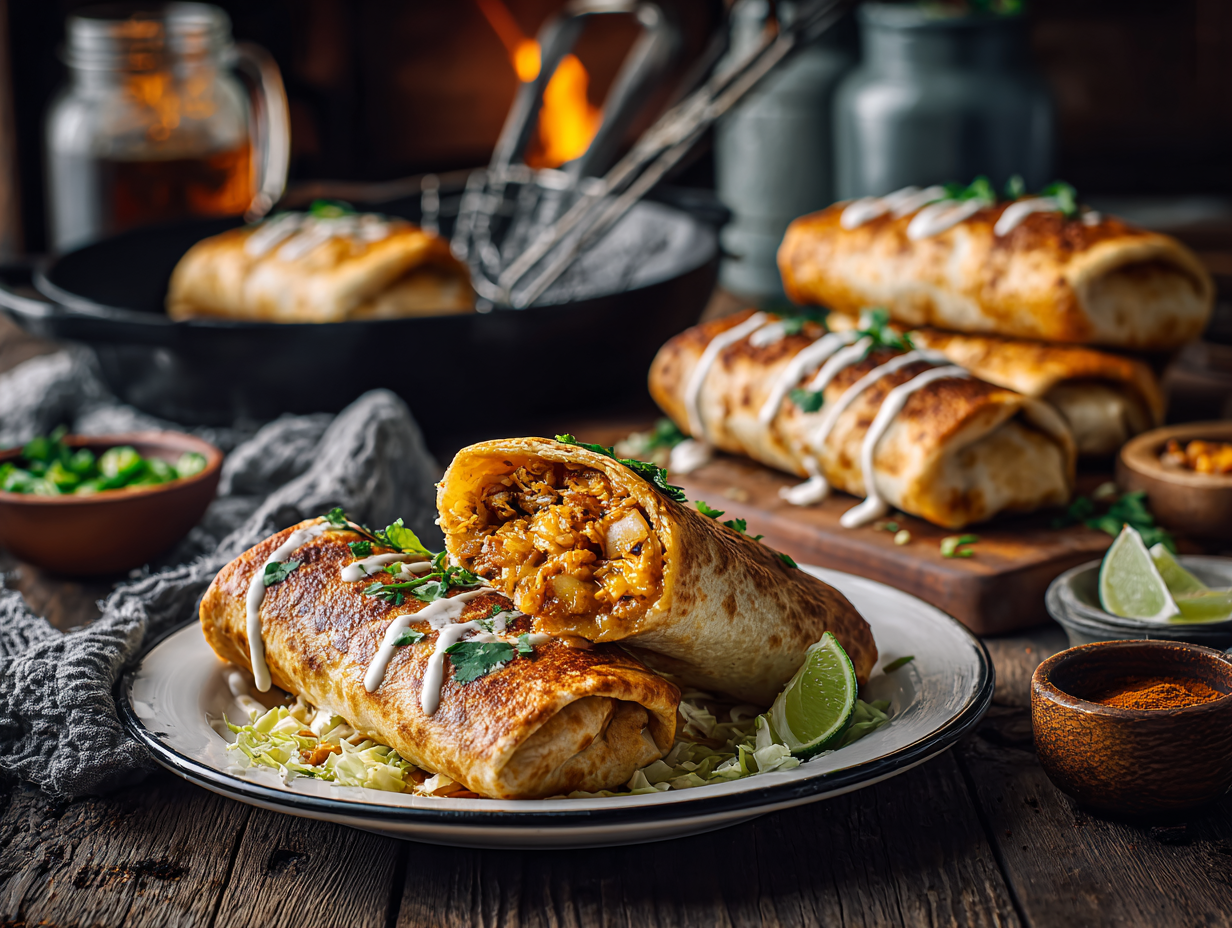
This is a shallow-fried chicken chimichanga built around rotisserie chicken, canned green chiles, and chipotle in adobo — ingredients you can grab at any grocery store on the way home. The filling comes together in one pan while the oil heats, so the whole thing lands on the table in 30 minutes. Crispy shell, hot savory filling, done.
Before you start
Two things actually determine whether these turn out crispy or soggy. First, get your oil to 350°F before the first chimichanga goes in — a thermometer is the only reliable way to confirm this, and it matters more than almost anything else in this recipe. Too cool and the tortilla soaks up oil instead of crisping; too hot and the outside browns before the inside heats through. Second, the refried beans in the filling aren’t just flavor — they act as a binder that holds everything together so the filling doesn’t push through the seams when you fry. Don’t skip them or reduce the amount, and make sure the seam side goes down first into the oil so it seals immediately on contact.
Mistakes to avoid
- Overfilling the tortillas. More filling sounds better but it makes the tortilla impossible to fold tightly, and loose folds burst open in the oil. Stick to the amount the recipe specifies and resist the urge to pack them.
- Using cold tortillas straight from the fridge. Cold flour tortillas crack when you fold them. Warm them in a dry skillet for 20–30 seconds per side, or wrap in a damp paper towel and microwave for 30 seconds. They’ll fold cleanly without splitting.
- Crowding the pan. Frying more than two at a time drops the oil temperature fast. Lower oil temp means longer cook time, which means greasier results. Fry in batches and let the oil come back to 350°F between them.
- Cutting them open right away. Let each chimichanga rest on a wire rack for 2 minutes before serving. The shell firms up as it cools slightly and the filling stops being lava-hot — especially important if you’re serving kids.
- Skipping the wire rack. Setting finished chimichangas on paper towels traps steam underneath and softens the bottom crust. A rack keeps air circulating and the shell stays crisp while you finish the batch.
Shopping notes
- Chipotle in adobo: Sold in small cans near the Mexican ingredients. You’ll only use one or two chipotles — freeze the rest flat in a zip-lock bag and break off pieces as needed. If heat is a concern, start with half a chipotle and taste the filling before adding more.
- Fire-roasted green chiles: Usually stocked with canned tomatoes or Mexican ingredients. Hatch brand and generic store-brand both work fine. Mild cans are labeled clearly — worth grabbing mild if you’re feeding anyone who’s sensitive to spice.
- Mexican crema: Found near sour cream in most grocery stores. Regular full-fat sour cream is a workable substitute; it’s thicker but the flavor is close enough.
- Large flour tortillas: Size matters here — you need 10-inch or larger so there’s enough tortilla to fold and seal properly. Burrito-size is the right call.
Storage and reheating
Leftover chimichangas keep in the fridge for up to 3 days in an airtight container. Skip the microwave for reheating — it turns the shell rubbery. Instead, put them in a 375°F oven or air fryer for 8–10 minutes until the shell crisps back up. The filling freezes well: make a double batch, portion it into zip-lock bags, and freeze for up to 2 months. On a busy night, thaw the filling in the fridge overnight, warm it in a skillet, wrap, and fry fresh — the assembled, fried chimichangas themselves don’t freeze as well because the tortilla gets soggy on thawing.
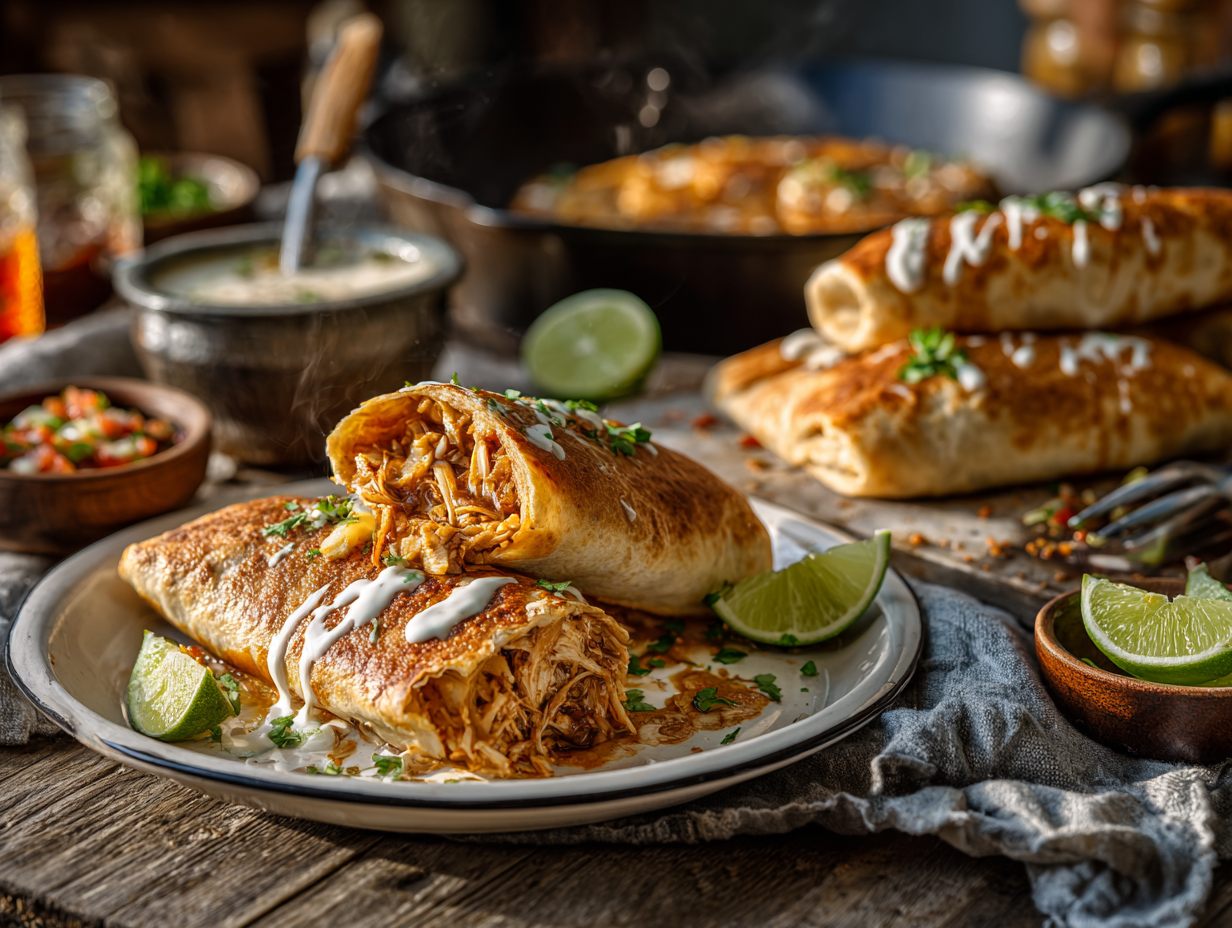
Crispy Weeknight Chicken Chimichangas

Equipment
- 12-inch deep skillet or sauté pan (for shallow frying)
- Medium skillet or saucepan (for filling)
- Tongs
- Instant-read or clip-on fry thermometer
- Cutting board and chef's knife
- Mixing spoon or spatula
- Paper towels and wire rack (for draining)
- Small bowl (for flour paste sealer, optional)
- Air fryer (optional alternative)
Ingredients
For the Filling:
- 1 tablespoon neutral oil (canola, avocado, or peanut) for sautéing aromatics
- 0.5 small yellow onion, finely diced about 1/2 cup
- 2 cloves garlic, minced
- 1 teaspoon ground cumin
- 1 teaspoon ancho chili powder sub regular chili powder if needed
- 0.5 teaspoon smoked paprika
- 0.5 teaspoon Mexican oregano, crumbled or regular oregano
- 2 tablespoons tomato paste
- 0.5 cup fire-roasted diced green chiles, drained from a 4 oz can
- 2 cups shredded rotisserie chicken, packed skin removed
- 0.5 cup low-sodium chicken broth
- 2 tablespoons chipotle in adobo, minced, plus a little sauce optional, adjust to heat preference
- 0.5 teaspoon kosher salt plus more to taste
- 0.25 teaspoon black pepper, freshly ground
- 0.5 cup refried beans (smooth style) helps bind the filling
For Assembly and Frying:
- 4 pieces large flour tortillas (10-inch, burrito-size) fresh and pliable
- 1 cup shredded Oaxaca or Monterey Jack cheese melt-friendly cheese
- 1.5 cups neutral high-heat oil (canola, peanut, or avocado) for shallow frying; add more as needed to reach ~1/2 inch depth
- 2 tablespoons neutral oil or cooking spray for air-fryer alternative, optional
For Serving:
- 0.5 cup shredded iceberg lettuce for crunch
- 0.5 cup pico de gallo or salsa fresca
- 0.33 cup Mexican crema or sour cream for drizzling
- 0.25 cup fresh cilantro, chopped
- 1 whole lime, cut into wedges
Instructions
Make the Filling (6–8 minutes):
- Heat 1 tablespoon oil in a medium skillet over medium-high heat until it shimmers. Add onion and sauté until translucent with lightly golden edges, about 3–4 minutes. Stir in garlic; cook 30 seconds until fragrant. Sprinkle in cumin, ancho chili powder, smoked paprika, and oregano; bloom the spices for 30 seconds to wake their oils. Add tomato paste; cook 1 minute, stirring, until brick red and slightly caramelized.
- Add green chiles, shredded chicken, broth, and chipotle (if using). Simmer, stirring, until the liquid reduces to a thick, juicy glaze, 3–4 minutes. Stir in refried beans to bind. Season with salt and pepper to taste. The filling should be moist but not runny—when you drag a spoon through, it should briefly hold a trail. Remove from heat.
Warm the Tortillas (0.5–5 minutes):
- For maximum pliability, wrap tortillas in a damp paper towel and microwave 20–30 seconds, or wrap in foil and warm in a 300°F/150°C oven for 5 minutes. Warm tortillas resist cracking when folded.
Heat Oil for Frying (3–4 minutes):
- In a 12-inch deep skillet, pour enough neutral oil to reach about 1/2 inch depth (~1 1/2 cups). Heat over medium to medium-high until the oil reaches 350°F/175°C. If you don’t have a thermometer, a wooden spoon will bubble steadily at the edges when dipped, and a tear of tortilla will sizzle on contact.
Assemble and Roll (3–4 minutes):
- Lay out warm tortillas. Divide the filling into 4 portions. Place a portion in the lower third of each tortilla, top with 1/4 cup cheese. Fold the left and right sides over the filling; then roll tightly from the bottom up into a compact burrito. Place seam-side down. For extra security, seal with two toothpicks or brush the seam with a quick paste of 1 tablespoon flour mixed with 1 tablespoon water.
Fry (6–8 minutes):
- Working in batches as needed to avoid crowding, carefully lower chimichangas seam-side down into 350°F/175°C oil. Fry 2–3 minutes per side until deep golden and crisp. Maintain oil temperature; adjust heat as necessary. Transfer to a wire rack set over paper towels to drain. Remove toothpicks before serving.
Air-Fryer Alternative (8–10 minutes):
- Brush or spray chimichangas all over with oil. Air fry at 400°F/200°C for 8–10 minutes, flipping halfway, until crisp and golden.
Finish and Serve:
- Plate on a bed of shredded lettuce, drizzle with crema, spoon over pico de gallo, and shower with cilantro. Serve with lime wedges. The perfect chimichanga is bronze-gold, audibly crisp, and releases a warm, roasted-chile aroma when cut.
Notes
Lisa’s Tips:
- Tortilla Insurance: Always warm tortillas until flexible. If they resist, give them another 10–15 seconds in the microwave so they don’t crack.
- Seal Like a Pro: A quick flour-and-water paste (1:1) brushed along the seam acts like edible glue. Press firmly for 10 seconds.
- Cheese Choice: Oaxaca melts lusciously with a gentle pull. Monterey Jack is a great weeknight standby. Pepper Jack adds a mild kick.
- Speed Flavor: Blooming spices in oil deepens flavor fast—don’t skip the 30-second bloom.
- Make it Vegetarian: Swap chicken for 2 cups black beans and 1 cup sautéed diced mushrooms or roasted sweet potato.
- Lighter Bake: Brush with oil and bake at 425°F/220°C for 12–15 minutes, flipping once. Texture is lighter, less shatteringly crisp.
- Heat Control: If the chimichangas brown too quickly, your oil is too hot. Aim to hover at 350°F/175°C for even color and gooey centers.
Serving Suggestions:
- Plate on a ribbon of crema, lean the chimichanga diagonally cut-side up to show the molten filling, and finish with pico and cilantro for color contrast.
- Pair with quick cilantro-lime rice and charred corn for a vibrant, textural plate. A crisp lager or a lime spritz is an ideal sip.
Culinary Context:
Chimichangas are commonly associated with the Sonoran/Tucson scene—legend says a burrito tumbled into hot oil and the happy accident stuck. This rendition honors that spirit with a borderlands flavor profile of green chiles, chipotle warmth, and a crisp tortilla shell.Optional Advanced & Make-Ahead:
- Make-Ahead Filling: Prepare the chicken mixture up to 3 days ahead; reheat until hot and thick before rolling.
- Batch Frying: Keep finished chimichangas crisp in a 250°F/120°C oven on a rack while you fry the rest.
- Queso Drizzle (5 minutes): Simmer 1/2 cup evaporated milk, whisk in 1 cup shredded cheese and a spoon of chiles until smooth; season and drizzle.
Nutrition
Common questions
Can I make these in an air fryer instead of frying them in oil?
Yes — brush the assembled chimichangas with a thin layer of oil and air fry at 400°F for 10–12 minutes, flipping once halfway through. The crust won’t be quite as shatteringly crisp as the shallow-fried version, but it’s genuinely good and much easier to clean up.
Can I use something other than rotisserie chicken?
Any cooked, shredded chicken works — leftover baked chicken thighs or breasts are ideal. Avoid deli-sliced chicken; the texture doesn’t hold up well once it’s mixed with the filling and fried.
How do I keep the chimichangas from unrolling in the oil?
Place them seam-side down first and don’t move them for the first 60 seconds — that’s enough time for the seam to seal in the hot oil. After that, they hold together reliably for the rest of the cook time.
Can I make the filling ahead of time?
Yes, and it actually helps. The filling keeps in the fridge for up to 3 days in a sealed container. On the night you’re cooking, just warm it briefly in a skillet before filling the tortillas so it’s pliable and not cold in the center after frying.
My family doesn’t like spicy food — can I dial back the heat?
Easily. Use half a chipotle pepper instead of a full one, or leave it out entirely and add a small pinch of smoked paprika for a similar smoky flavor without the heat. Mild canned green chiles add almost no heat on their own, so those can stay.
What oil should I use for frying, and how much do I need?
A neutral oil with a high smoke point — vegetable, canola, or avocado oil — is the right choice. You need enough to come about half an inch up the side of the pan, which is typically 1 to 1½ cups depending on your skillet size. Skip the garnish of shredded iceberg on the side if you’re short on time — not worth the extra dish.
If you liked this one
- Quick Chicken Enchiladas Rojas
- Quick White Chicken Chili
- Sizzling Skillet Steak Fajitas
- Citrus Mojo Rice and Beans